Indoor air quality isn’t just a buzzword, it’s a real concern for anyone dealing with dust, pet dander, or seasonal allergies indoors. The Lab Charge air purifier has gained attention among homeowners looking for effective filtration without the guesswork. Unlike generic models that promise clean air but underdeliver, Lab Charge units are designed with laboratory-grade technology adapted for residential use. This guide walks through what sets these units apart, how they operate, and what you need to know before installing one in your home.
Table of Contents
ToggleKey Takeaways
- Lab Charge air purifiers combine HEPA filtration with electrostatic pre-filter technology to capture particles as small as 0.3 microns, including pollen, dust mites, and bacteria for effective home air quality management.
- The three-stage filtration process—electrostatic pre-filter, true HEPA filter, and optional activated carbon layer—extends filter life to 12–18 months and reduces maintenance costs compared to standard units.
- Lab Charge systems deliver measurable benefits for allergy and asthma sufferers, with quiet operation (35–50 dB at lower speeds) and low energy consumption of just $3–$8 per month.
- Proper sizing requires matching the purifier’s CFM to your room volume, targeting 4–5 air changes per hour for optimal indoor air quality in frequently occupied spaces.
- Routine maintenance of the Lab Charge air purifier—including pre-filter cleaning every 2–4 weeks and HEPA filter replacement every 12–18 months—ensures sustained performance and prevents airflow reduction.
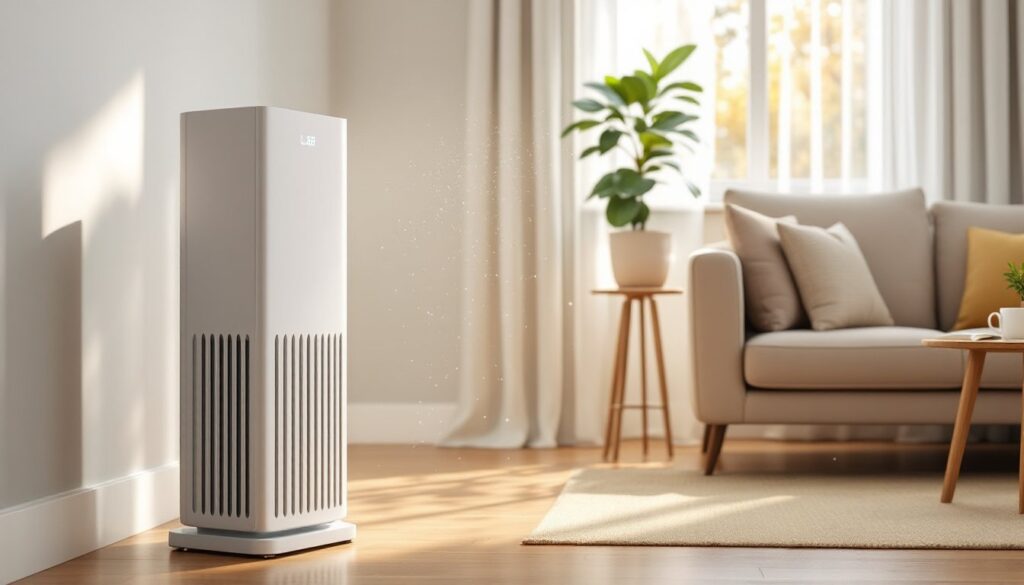
What Is the Lab Charge Air Purifier?
The Lab Charge air purifier is a high-efficiency filtration system originally developed for laboratory and medical environments, now scaled for home use. It combines HEPA filtration (High-Efficiency Particulate Air) with an electrostatic charge layer to capture airborne particles as small as 0.3 microns, including pollen, mold spores, dust mites, and some bacteria.
Unlike standard HEPA-only units, Lab Charge models add a positively charged pre-filter that attracts negatively charged particles before they reach the main HEPA filter. This extends filter life and improves capture rates for ultra-fine particles. The housing is typically powder-coated steel or high-impact ABS plastic, designed to handle continuous operation in environments where air quality directly impacts health, think home workshops, nurseries, or rooms with poor ventilation.
Most Lab Charge units are freestanding tower or box designs, ranging from compact 200-square-foot models to larger 800-square-foot systems. They’re not built-in HVAC components: these are plug-and-play appliances that supplement your existing heating and cooling.
How Lab Charge Air Purifiers Work
Lab Charge purifiers use a three-stage filtration process. Understanding each stage helps you maintain the system and troubleshoot issues down the line.
Stage 1: Electrostatic Pre-Filter
Air enters through a washable metal or synthetic mesh screen that carries a low-voltage positive charge (typically 5–12 volts DC). This attracts larger particles, pet hair, lint, dust, and prevents them from clogging the HEPA filter. You’ll clean or replace this pre-filter every 1–3 months depending on household conditions.
Stage 2: True HEPA Filter
The core of the system. A pleated fiberglass filter captures 99.97% of particles 0.3 microns or larger. This is the same standard used in hospital operating rooms and cleanrooms. Airflow resistance increases as the filter loads with particles, which is why monitoring the filter indicator is critical.
Stage 3: Activated Carbon Layer (Optional)
Some Lab Charge models include a final carbon stage to absorb volatile organic compounds (VOCs), smoke, and odors. This layer is especially useful in homes with recent paint, new flooring, or cooking odors. Carbon filters saturate over time and don’t regenerate, they need replacement every 6–12 months.
The motor pulls air through the stack at rates between 150–400 cubic feet per minute (CFM), depending on fan speed. Higher CFM means faster air changes per hour (ACH), which is how you match the purifier to your room size.
Key Benefits of Using a Lab Charge Air Purifier at Home
Lab Charge systems deliver measurable improvements in indoor air quality, especially in homes with specific challenges.
Allergy and Asthma Relief
The electrostatic pre-filter and HEPA combination captures common allergens before they circulate. Many users report fewer symptoms during high-pollen seasons or when pets shed heavily. If you’re comparing options, lab-tested results can help verify performance claims.
Extended Filter Life
By trapping larger particles in the pre-filter, the HEPA element lasts longer, often 12–18 months instead of the typical 6–9 months. That cuts replacement costs and reduces maintenance frequency.
Quiet Operation at Lower Speeds
Lab Charge motors are often brushless DC designs, which run quieter than traditional AC motors. At low or medium speed, noise levels range from 35–50 decibels, quieter than a refrigerator. High speed pushes 60+ dB, similar to normal conversation.
Energy Efficiency
Most units draw 30–80 watts on medium speed, comparable to a household light bulb. Running 24/7 costs roughly $3–$8 per month depending on local electricity rates.
Reduction of VOCs and Odors
Models with activated carbon layers help mitigate off-gassing from furniture, carpets, and finishes, a common issue in newly renovated homes or spaces with limited ventilation.
Choosing the Right Lab Charge Air Purifier for Your Space
Matching the purifier to your room size and air quality needs prevents buyer’s remorse. Here’s what to measure and consider.
Room Size and ACH Rating
Check the unit’s Clean Air Delivery Rate (CADR) and recommended square footage. For effective filtration, aim for 4–5 air changes per hour in rooms where you spend the most time. Calculate your room volume (length × width × ceiling height in feet), then divide the purifier’s CFM by room volume and multiply by 60 to get ACH.
Example: A 300-CFM unit in a 12′ × 15′ room with 8′ ceilings = 1,440 cu ft. (300 ÷ 1,440) × 60 = 12.5 ACH, more than enough.
Filter Availability and Cost
Replacement HEPA filters for Lab Charge units typically cost $40–$80, with carbon filters adding another $15–$30. Verify that filters are available from multiple suppliers, not just the manufacturer. Proprietary filters can become a long-term expense or availability issue.
Noise Tolerance
If the purifier will run in a bedroom or home office, test the noise level at different speeds. Many smart home device reviews include sound meter readings, which can guide your choice.
Portability vs. Permanent Placement
Tower models with casters are easy to move between rooms. Box-style units often lack handles and weigh 15–30 pounds, plan on a semi-permanent location. If you’re filtering a workshop or garage, look for models with metal housings that resist impact and dust buildup.
Smart Features (If Desired)
Some Lab Charge units integrate with Wi-Fi, allowing remote control, filter-life tracking, and air-quality monitoring via smartphone. These features add $50–$150 to the price but can simplify maintenance reminders.
Installation and Maintenance Tips
Lab Charge purifiers require minimal setup, but placement and upkeep directly affect performance.
Installation Steps
- Unbox and inspect. Check for shipping damage, especially to the HEPA filter housing. Remove all packaging materials, including plastic wrap on filters.
- Position the unit. Place it at least 12–18 inches away from walls and furniture to allow unrestricted airflow. Avoid corners, which create dead zones.
- Plug into a grounded outlet. Don’t use extension cords or power strips with other high-draw appliances. Lab Charge units pull steady current, and voltage sags can damage the motor.
- Set initial fan speed. Start on medium speed and adjust based on noise and airflow feel. Most units default to auto mode, which cycles speed based on built-in air quality sensors.
Routine Maintenance
• Pre-filter cleaning: Vacuum or rinse (if washable) every 2–4 weeks. Let it dry completely before reinstalling, moisture degrades the electrostatic charge.
• HEPA filter replacement: Follow the manufacturer’s schedule, typically 12–18 months. A clogged HEPA filter reduces airflow and strains the motor.
• Carbon filter replacement: Every 6–12 months, or when odors return. Carbon doesn’t visually degrade, so tracking replacement dates matters.
• Exterior cleaning: Wipe the housing with a damp cloth monthly to prevent dust accumulation on vents and sensors.
Safety Notes
• Unplug before servicing. Even low-voltage electrostatic components can deliver a mild shock.
• Dispose of filters properly. HEPA filters contain trapped allergens and particles, seal them in a plastic bag before discarding.
• Check the power cord. Frayed or damaged cords are a fire hazard: replace the unit if the cord shows wear.
For homes integrating multiple devices, many home automation guides cover how to sync air purifiers with thermostats or humidity sensors for optimized indoor climate control.
Common Issues and Troubleshooting Solutions
Even well-maintained units can develop problems. Here’s how to diagnose and fix the most common issues.
Reduced Airflow or Weak Suction
• Cause: Clogged pre-filter or saturated HEPA filter.
• Fix: Clean or replace the pre-filter. If the HEPA filter is near the end of its service life, replace it even if the indicator hasn’t triggered.
Unusual Noise or Vibration
• Cause: Loose fan assembly, debris in the motor housing, or unbalanced placement.
• Fix: Power off and inspect the interior for foreign objects (screws, packaging material). Ensure the unit sits on a level surface. If vibration persists, the motor bearings may be failing, contact the manufacturer.
Persistent Odors Even though New Carbon Filter
• Cause: Odor source overwhelming the carbon capacity, or VOC levels too high for residential filtration.
• Fix: Identify and remove the odor source if possible (e.g., moldy drywall, pet waste, chemical storage). For renovation-related VOCs, increase ventilation with open windows and exhaust fans while the purifier runs.
Filter Replacement Indicator Won’t Reset
• Cause: Improper reset procedure or sensor malfunction.
• Fix: Consult the manual for the reset sequence, most require holding a button for 3–5 seconds after installing a new filter. If the indicator stays on, the sensor may need recalibration or replacement.
Unit Won’t Power On
• Cause: Tripped breaker, faulty outlet, or internal fuse blown.
• Fix: Test the outlet with another device. Check your home’s breaker panel. If the outlet works and the breaker is fine, the unit’s internal fuse may have blown, this typically requires professional service or warranty replacement.
Electrostatic Pre-Filter Not Charging
• Cause: Moisture on the filter, dirty contacts, or power supply issue.
• Fix: Ensure the pre-filter is completely dry. Clean the contact points where the filter seats with a dry cloth. If the charge still doesn’t activate, the low-voltage power supply may have failed.
Conclusion
Lab Charge air purifiers bring laboratory-grade filtration into the home, offering reliable performance for allergy sufferers, pet owners, and anyone serious about indoor air quality. Proper sizing, regular maintenance, and realistic expectations about filter life keep these units running efficiently for years. Match the model to your room size, stay on top of filter changes, and don’t skip the pre-filter cleaning, those steps make the difference between a dust collector and a functional air quality solution.