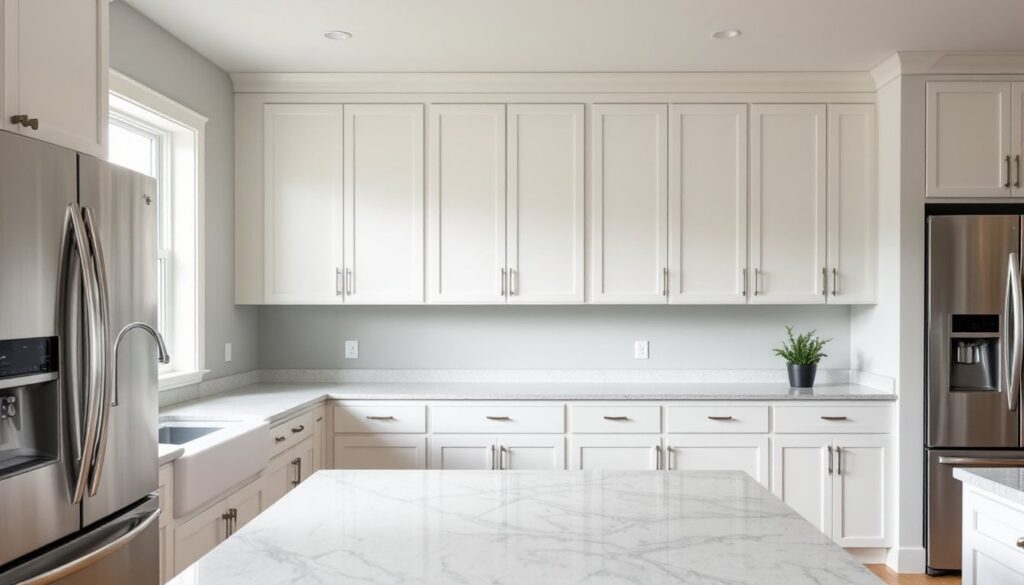
That gap between the top of your kitchen cabinets and the ceiling isn’t just wasted vertical space, it’s a dust trap and a missed storage opportunity. Extending cabinets to the ceiling eliminates that awkward void, adds usable storage, and gives your kitchen a custom, built-in look without a full remodel. Whether you’re working with builder-grade cabinets or vintage units that sit eight inches below the ceiling line, closing that gap is a manageable weekend project for most DIYers. The process involves either building cabinet toppers or using trim and soffit techniques, depending on your budget, skill level, and the look you’re after.
Table of Contents
ToggleKey Takeaways
- Extending kitchen cabinets to the ceiling eliminates wasted vertical space, adds 12–18 inches of additional storage, and creates a custom built-in look without a full kitchen remodel.
- Floor-to-ceiling cabinetry makes ceilings appear higher, simplifies cleaning, and appeals to homebuyers as a sign of quality and thoughtful design updates.
- Choose between cabinet toppers (for functional storage on larger gaps) or trim-based soffits with crown molding (for smaller gaps requiring minimal carpentry skills).
- Measure your gaps at multiple points, subtract ½–¾ inch for scribing and shimming, and use 3/4-inch plywood for structural cabinet toppers to ensure durability and proper weight support.
- Prime and paint all components before installation to avoid difficult ceiling corner work, then secure toppers to cabinets and ceiling joists with 2½-inch screws spaced every 16 inches.
- This is a manageable weekend DIY project costing $150–$300 in materials for a typical 10-foot run, offering solid return on effort if you plan to sell your home within a few years.
Why Extend Kitchen Cabinets to the Ceiling?
The space above kitchen cabinets serves no practical purpose in most homes. It collects grease, dust, and forgotten décor items, and it visually chops up the room. Extending cabinets upward creates additional storage, often an extra 12 to 18 inches of shelf space per cabinet run, which is especially valuable in smaller kitchens.
From a design perspective, floor-to-ceiling cabinets make ceilings appear higher and give the kitchen a cleaner, more cohesive look. This treatment is standard in modern and transitional kitchen design ideas, where eliminating visual clutter is a priority. It also increases perceived home value: buyers consistently rank updated kitchens as a top feature, and built-in-looking cabinetry signals quality.
Beyond aesthetics, closing the gap simplifies cleaning. No more climbing a stepladder to wipe down cabinet tops or retrieving dust-covered serving platters. If you’re planning to sell within a few years, this upgrade offers solid return on effort, it’s a relatively low-cost project that photographs well and appeals to a broad range of buyers.
Planning Your Cabinet Extension Project
Before cutting a single piece of material, confirm whether your cabinets are structurally sound enough to support additional weight. Older cabinets with particleboard cases or loose hanging rails may need reinforcement. Inspect the ceiling framing, too, if you’re attaching anything heavy, you’ll want to hit ceiling joists or blocking, not just drywall.
Decide on your approach: cabinet toppers (separate boxes that sit on top of existing cabinets) or faux soffits and crown molding (trim-based solutions that fill the gap without adding functional storage). Toppers require basic carpentry skills and tools like a circular saw or miter saw, a drill, and a level. Soffit builds are faster and lighter but won’t give you usable shelf space.
Budget for materials. For a typical 10-foot cabinet run, expect to spend $150–$300 on plywood, edge banding or trim, primer, paint, and hardware. Costs vary by region and material grade. If your cabinets have a specialty finish or you’re matching stained wood, factor in custom color-matching or veneer costs.
Measuring Your Space and Determining the Gap
Measure from the top of each cabinet to the ceiling at multiple points along the run. Ceilings are rarely level, and older homes can have variations of an inch or more across a single wall. Use a laser level or a long straightedge to map high and low points.
Record the width and depth of each cabinet section. Standard base and wall cabinets are 24 inches deep (wall cabinets are typically 12 inches deep), but custom or vintage units may differ. Your topper boxes need to match the cabinet footprint exactly to look built-in.
Subtract 1/2 inch to 3/4 inch from your ceiling height measurement to allow for scribing and shimming during installation. Trying to build to exact ceiling height guarantees frustration, walls and ceilings are never perfectly square. That small gap gets hidden with trim or caulk later.
Methods for Extending Cabinets to the Ceiling
The method you choose depends on whether you need functional storage or purely visual continuity. Both approaches work: the right one depends on your goals, skill level, and how the kitchen is used.
Building Custom Cabinet Toppers
Cabinet toppers are simple plywood boxes that sit on top of existing cabinets. They’re the best choice when you want the extra storage or when the gap is large (10 inches or more). For boxes that will hold items, use 3/4-inch plywood, birch or maple veneer if you’re painting, matching species if you’re staining.
Cut side panels to match the depth of your existing cabinets (typically 12 inches for wall units). The height equals your gap measurement minus 3/4 inch. Cut a top, bottom, and back from 1/4-inch or 1/2-inch plywood. Assemble with wood glue and 1-1/4-inch brad nails or pocket screws. Pocket screws are stronger, especially for taller toppers, but require a jig.
Finish the front edge with iron-on edge banding, a strip of real wood veneer, or a simple 1×2 face frame, depending on your cabinet style. If your existing cabinets have a face frame, match that detail. Frameless (European-style) cabinets look best with flush, banded edges.
Prime and paint the toppers before installation. Trying to get a brush into tight ceiling corners after the fact is miserable. Use a high-quality cabinet-grade primer and at least two coats of semi-gloss or satin paint for durability. If you’re matching existing stained cabinets, test your stain and finish on scrap first, wood species and age affect color significantly.
Secure toppers to the cabinets below with screws driven up through the cabinet top into the topper’s bottom panel. Then fasten the topper to the wall studs or ceiling joists with 2-1/2-inch screws. Use shims behind the topper to account for any wall irregularities. Finish with a bead of caulk where the topper meets the ceiling.
Installing Crown Molding and Soffits
If the gap is small (6 inches or less) or you don’t need storage, a trim-based solution is faster and requires fewer tools. This method uses a framework of 1×2 or 1×3 furring strips to create a faux soffit, which is then wrapped with drywall or thin plywood and finished with crown molding.
Build a simple ladder frame from furring strips: one horizontal strip screwed to the ceiling (into joists), one screwed to the top of the cabinets, and vertical connectors every 16 to 24 inches. Use a level to keep the bottom rail flush with the cabinet fronts.
Cover the frame with 1/4-inch plywood or drywall. Plywood is easier for DIYers, it doesn’t require taping, mudding, or sanding. Cut panels to width, attach with brad nails, then fill nail holes with wood filler.
Install crown molding at the top where the soffit meets the ceiling. Use a miter saw for clean 45-degree cuts at inside and outside corners. Coping inside corners (cutting the profile with a coping saw) gives tighter joints than mitering, especially if walls aren’t perfectly square. This technique is common in woodworking project plans that emphasize joinery quality.
Paint the entire assembly to match your cabinets. If you’re working with a bold color or dark stain, the contrast between the soffit and ceiling can be dramatic, consider whether you want the soffit to match the cabinets or the ceiling for the most cohesive look.
Step-by-Step Installation Process
Start by clearing the cabinet tops and protecting countertops with drop cloths. Remove any existing crown molding or trim from the cabinets. Patch and sand any damage to the cabinet finish so the new work blends seamlessly.
For cabinet toppers:
- Set the first topper box in place and check it for level in both directions. Use shims between the topper and the cabinet top to correct any tilt.
- Drill pilot holes and drive screws up through the existing cabinet into the topper’s bottom panel. Two screws per cabinet section is usually enough.
- Locate ceiling joists with a stud finder. If joists run parallel to the cabinets, install blocking between joists or use toggle anchors rated for the weight.
- Screw the topper to the ceiling or wall framing with 2-1/2-inch screws, spacing them every 16 inches.
- Install the next topper, shimming as needed to keep faces aligned. Use clamps to hold adjacent boxes tight together while you screw them to each other through the side panels.
- Fill screw holes and any gaps with wood filler. Sand smooth once dry.
- Caulk the joint where the topper meets the ceiling with paintable latex caulk. Run a wet finger along the bead for a clean finish.
- Touch up paint as needed.
For soffit and crown builds:
- Snap a level chalk line on the wall where the bottom of the soffit will land (aligned with cabinet fronts).
- Screw the ceiling furring strip into joists, then attach the front strip along your chalk line into wall studs.
- Connect the two with vertical strips, ensuring they’re plumb.
- Attach plywood or drywall panels, working from one end to the other.
- Cut and install crown molding, starting with the longest, most visible wall. Nail molding to the furring with a brad nailer or 1-1/2-inch finish nails.
- Fill nail holes, caulk joints, prime, and paint.
Safety notes: Wear safety goggles when cutting, hearing protection if using power saws for extended periods, and a dust mask when sanding. Work from a stable stepladder or platform, don’t overreach. If you’re working alone, use clamps or temporary braces to hold components in place while fastening.
This isn’t structural work, so permits typically aren’t required. But, if you’re modifying soffits that contain plumbing vents, HVAC ducts, or electrical runs, consult a licensed contractor. Many designers featured on curated home product guides recommend professional help for any project that involves hidden utilities.
Once installed, the extended cabinets should look original to the kitchen. Edges should be tight, paint should match, and there should be no visible gaps or misalignment. If you’ve built toppers with doors or open shelving, make sure they’re accessible, anything above 7 feet typically requires a stepstool, so plan storage accordingly.